You can purchase it, or make your own for much cheaper! Wet-edge to wet-edge is the best, and even then, try to be precise. Continue leveling it with the folded cloth, and dont wipe with the dry cloth this time. Follow steps one, five, and six of the instructions above, ensuring you level the unevenness as you sand. If youre dealing with scratches that are right at the top of the clear coat, and dont go very deep at all, steel wool would be the better choice for you. For deeper scratches that need filling, reach for aMinwax Blend-Fil Pencil. Always thin oil-based polyurethane. 3 Wipe all of the dust off of the surface, make sure you get everything before applying your first coat. Water-based polyurethane dries quickly, so be methodical and try not to overlap wet edges with dry edges as youll get a double thickness and an uneven finish. Crazed clear coats are similar, but have less of a pattern than alligatored clear coats do.
Usually due to excessive sunlight or temperature changes. The primary reason polyurethane goes cloudy is moisture. Once this chemical reaction occurs, there is no way to reverse it.
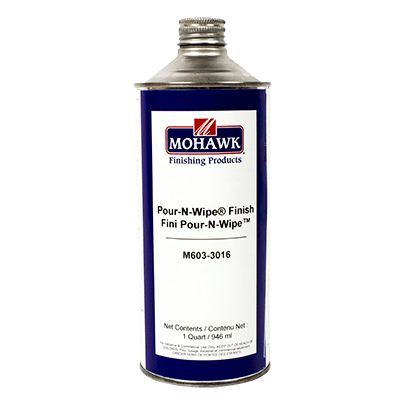
wipe pour mohawk finish polyurethane category finishing I reserve the right to remove, replace, or relocate images or content on the site. Work quickly, and dont soak the wood too much with water. If the area becomes sticky, youre looking at a water-based polyurethane. A mixture of 50/50 for the first couple of coats works perfectly. Stir gently, thin oil-based polyurethane, do not overwork when applying and apply when the surrounding temperature is warm. Strategically placed doormats and throw rugs will help, but regular vacuuming and cleaning withMinwax Hardwood Floor Cleanerwill remove the grit before it harms the surface. If using water-based polyurethane, youll need to be quick as it dries so rapidly. Excessive moisture, such as what we find around the dishwasher or sink, can eventually weaken even the strongest of finishes. 1.

Oil-based takes longer to dry and is more forgiving.
Do you know of any repair tricks for lacquer, shellac, polyurethane, or varnish? Be sure to get it as thin and level as you can. Stay with me for a couple of minutes to learn why mistakes can happen, how to fix polyurethane mistakes and how to apply polyurethane to avoid making similar mistakes in the future. Vacuum the surface and wipe with a painters tack cloth to remove all traces of dust and sandpaper grit.
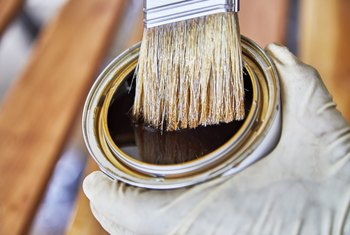
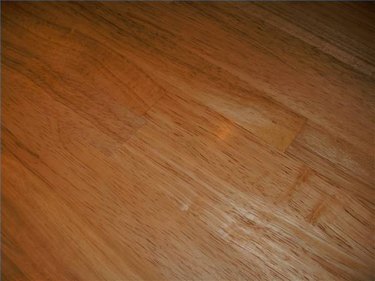
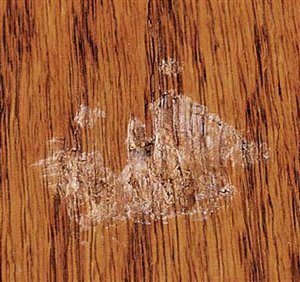
scratches table wood polyurethane repair finish cracked solid scratched doityourself lacquer ll need hours Its difficult enough to remove wax completely from wood, dont make it harder on yourself! Polyurethane cures in two steps; the first is the evaporation of the solvent followed by a chemical reaction that occurs where the resins harden off in contact with oxygen. The method of stripping back old polyurethane and reapplying the finish is the same in most circumstances. Allow the area to dry (a fan or hair drier speeds the process), then brush on a liberal coat ofMinwax Wood Hardener. Then I do step five of the instructions for removing and reapplying polyurethane which youll find above. I know a lot of people that jump immediately into completely refinishing a piece of furniture when the surface clear coat is scratched. Water is wood's enemy. If its light superficial scratching, you can use a buffer and a mildly abrasive polish to buff and restore the surface. If you have that problem, thin the polyurethane down, so its less viscous. Since I began my custom refinishing business, Ive been amazed by the number of requests Ive gotten for help with repairing scratched clear coats on dining tables, coffee tables, etc. document.getElementById( "ak_js_1" ).setAttribute( "value", ( new Date() ).getTime() ); As an Amazon Associate I earn from qualifying purchases at no additional cost to you. Once the polyurethane has been removed, wipe down the whole area to ensure its clean. This will give the new coat something to grab onto and may blend in some of the surface scratches youre trying to repair.
Once dry, continue with the above instructions from step three. Work quickly, and dont let your brush dry out. If the scratch doesnt change color at all, then it is definitely only surface scratch. All 4 are great in their own way, but not perfect thats for sure!

Again, making the amalgamation process possible.

Varnish is an oil-based resin that is great for outdoor furniture. The only thing you might need to know is whether its water-based/waterborne or oil.
polyurethane remove finish hunker stain diy wood finishes staining Do not shake; stir gently. I cannot be held accountable for your safety or the outcome of a project, based solely on my articles or information. Then scuff sand the entire surface before applying a final light coat of polyurethane over everything. Dip the brush into the tin of polyurethane, but do not wipe it against the side of the tin to remove excess. Change to a fresh one to avoid this annoyance. Check out my posts on: Then come back to this post and complete your finish!
damaged finish touch repairing wood popularwoodworking sealant mortar polyurethane rubber repair protection reinforcement polyurethane cactus applied matting enhanced bond provide offload fpso hose between projects Meaning youll need to completely refinish it and repair the wood, before reapplying your stain and clear coat. If I link to a product, I use it, I love it, and I think you would too! Since 2016, I have been restoring and painting vintage wood furniture, for customers who just plain enjoy a good backstory in their home decor. 4 Pour wiping poly/varnish onto the surface, and spread it over the area using a dry cloth.

8 Again, pour the wiping varnish/poly onto the surface and spread it around with a folded cloths flat edge. Both can be repaired the same way, which I will discuss later in this article. You can use a roller but use a fine nap, lambswool for oil-based polyurethane, or microfiber for water-based polyurethane. Youll see a bunch of small, intersecting lines that resemble the rough skin of an alligator. Although it needs to be reapplied over time, its actually a nuisance to completely remove. I Kaitlyn, of KRay Custom Refinish, am not a certified professional in any of the topics I discuss in my posts. If youve dried it thoroughly, and see this haze, you can try getting it off with 0000 steel wool and linseed oil. You get overlap when one area of polyurethane has dried, and you slightly overlap that dry area while applying finish to an adjacent area. So today I will discuss repairing damaged clear coats. To fix a bad polyurethane job, you first need to sand down old polyurethane and re-apply the finish. Allow the excess to drain back into the tin naturally before applying the brush to the wood. If I had to sum up four points to remember, its clean, gentle, light, and thin! Wood tables are the centermost gathering place in your home. Hopefully, Ive shared with you some knowledge that will help you with future wood clear coat repairs. Clever right? Always.


Working with the grain, with medium to heavy pressure. If I learn of a new technique or method for something I have already spoken about, I will update that article where I see fit. Wrap a clean cloth around the sponge to form a pad, and wipe the polyurethane off. Yes, it does keep for a long time but it does require the lid to be airtight. Oil-based polyurethane likes to stick to anything but itself, so sanding is a must to ensure good adhesion. I'm a woodworker, metalworker, landscape photographer, writer, Python and PostgreSQL programmer, and pilot. You may be surprised! If you suspect the problem has been caused by the underlying stain or an oily timber, carry out steps one and two of the instructions above.
Fortunately, all it takes is a few minutesplus the right Minwax productsto both roll back time and protect your wood for years to come. Either way, these little cracks are in the finish only, not the wood. Feel free to take a look around, share, learn, and please enjoy :-) Click my photo to learn more! Porch.coms latest post, Experts Furniture Guide from DIY to Home Design. Recent Post: Applying Polyurethane Perfectly.
Use mineral spirits to ensure the removal of any waxes. What Are The Best Food-Safe Wood Finishes? Repeat step two before applying a further coat of polyurethane. Its far easier to remove wet polyurethane and have another go than let it dry and need to sand it. Very lightly sand the dry coat. Reamalgamation can be done on lacquer or shellac clear coats that have cracks, scratches, or have alligatored or crazed over time. Wiping varnish/poly is thinner than brushing varnish/poly so youll need to put on more coats when wiping it on. Once the second coat dries, again, buff it with 0000 steel wool. I created a nice little printable chart for you to hang up in your workspace It will hopefully help you to remember the steps for identifying each clear coat, and what you can do to repair them! If you choose to repair only a small spot or multiple small spots, you will have to get it to blend in with the clear coat thats already on the piece. All opinions expressed on this site are 100% my own, and 100 % OPINION based on true experiences with certain products and techniques. The sealer will seal the stain and timber to prevent leaching.
polyurethane crack concrete sealant construction quikrete cracks Required fields are marked *. If your existing urethane finish needs extra protection but not a total refinishing, you can re-coat it withMinwax Helmsman Spar Urethane, provided you follow the three rules for re-coating: clean, dry and scuff. Wax applied on top of other clear coats like lacquer or shellac, helps to polish it up nicely. Clean the area with mineral spirits, or denatured alcohol to remove wax and dirt. How to Paint Particle Board Furniture | Faux Barn Door Coffee Table, The Best Sander For Stripping Furniture Paint, Stain, & More in Minutes, Repairing Scratched Clear Coats | Lacquer vs. Shellac vs. Varnish vs. Polyurethane. They may turn out even better than new, Your email address will not be published. You can repeat step five to give the number of coats you seek.
